
Often poorly soldered or damaged guitar cables are the reason when the guitar signal sounds dull or too quiet. With an Ohm meter, the cables can be easily measured. But often guitar cables are not only soldered incorrectly, but also measured incorrectly. Therefore, I would like to explain you in this blog article how you test guitar cables properly and what you have to pay attention to when soldering the cable.
Testing guitar cables properly:
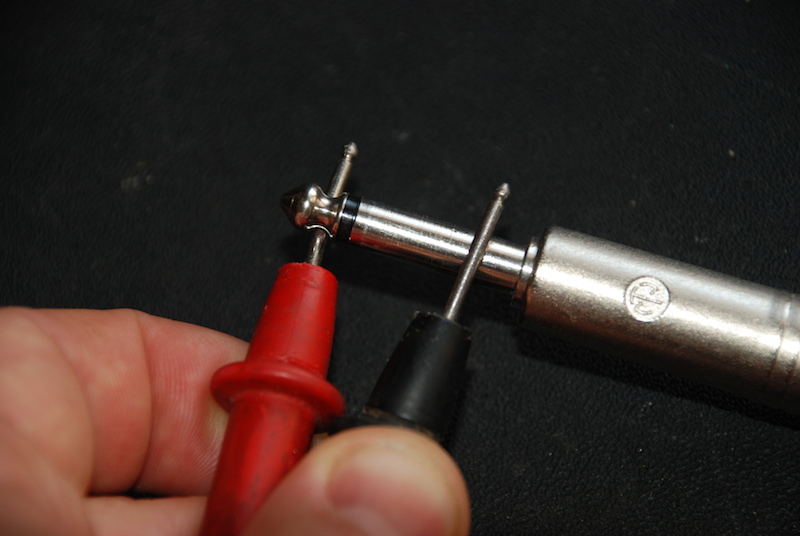
Correctly testing guitar cables
- The plugs must be on a non-conductive surface. A carpet is not suitable for measuring, because a carpet builds static charges.
- Do not touch the plugs of your guitar cable nor the tips of the testing cables with your fingers. Otherwise you will measure the resistance of your own body.
- The resistance between the tip of one plug and the tip of the other plug may be only a few Ohms. Ideally, the resistance is less than one Ohm.
- The resistance between the sleeve (shield) of one plug and the sleeve of the other plug may be only a few Ohms. Ideally this resistance is less than one Ohm.
- But the most important thing is – and most people do not measure it – the resistance between sleeve and tip. You just have to measure on one side of the guitar cable. This resistance should be infinite, meaning have no connection (open loop). Cables that were soldered incorrectly or too hot, or cables that are mechanically heavily loaded, can have a resistance here. If this resistance is near zero Ohms, then the cable has a short circuit. When the measurement is in kilo or mega Ohm range, the cable has a resistance, which can lead to dynamics, treble and volume losses.
Soldering guitar cables correctly:

Correctly Soldered Guitar Cable
- Strip the outer covering of the cable, paying attention to the correct length (with Neutrik plugs, these are 2cm). Take care to not damage any braid of the shield.
- Separate the braids of the shield from the center conductor and organize (twist) them into a single wire, thus resulting in a single conductor. Here you have to make sure that no individual braid sticks out.
- If the shield has an additional aluminum foil, you have to cut off it (to the same length as the cable is stripped).
- Depending on the connector type you use, the previously twisted shield conductor must be shorten. The screen must not touch the middle pin (signal conductor) of the plug in any way.
- Strip the inner signal conductor of the cable only a little (3- 4mm) and also twist the braids.
- Before you solder the cable to the connector, you must tin the the signal and shield conductors of the cable.
- Also tin the solder joints of the plug previously.
- Solder the shield first, and then the signal conductor.
- And now the most important: DO NOT SOLDER TOO HOT and not too long! Make the solder on the plug just briefly liquid, then tuck the cable end immediately into it and wait to cool. You must work swiftly. Do NOT stick the cable to the plug while continue heating the solder for more than a second or two. The cable ends must not move during cooling down, otherwise it results in a so-called “cold joint”. The solder must be smooth and not completely frosted after cool down.
=> The plastic parts of the cable must not melt. Otherwise it may cause the above-mentioned resistance which results in signal loss.
IMPORTANT: There are also cables with conductive plastic, for example, Mogami. Here you have to observe the manufacturer’s instructions.
Here is a link to a Youtube video where everything is very well explained:
https://www.youtube.com/watch?v=nE9P67_E5N8


